Sunday 21 November 2010

Tiffin/Refridgerator Cake

 
Tiffin or Refridgerator Cake, whatever you want to call it, is one of those things that you can make quickly without too much hassle and without worrying about weighing everything perfectly.  All you need to do is chuck a load of things into some melted chocolate, butter and golden syrup and you're nearly done. 


This ease and no fuss style is represented by my Mums recipe for Tiffin, well if you can call it a recipe that is.  It's a small scrap of paper on which is written "biscuits, choc, golden syrup, sultana's, cherries, 2oz marg".  Thats it.  Only one actual measurement, no step by step instructions, no faffing about.  Just simple and straight to the point.

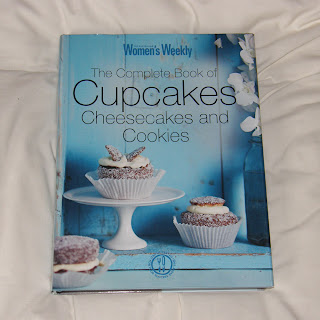
So when I decided to whip some up a few days ago, I combined this list with a recipe I found in Cupcakes, Muffins & More by Love Food.  My Mum got me this recipe book a few months ago and I've not got round to using it much yet.  The first thing I made from it was some melt in the middle chocolate cupcakes which you serve warm and they were very successful, apart from the fact that my camera broke whilst taking photo's of them!


When I made these I slightly underestimated how much chocolate I needed as I didn't really have a lot in the house, so I just went ahead anyway.  It wasn't a disaster but I did end up with one half of the tray not having any chocolate topping!  I also had a minor problem when I was melting some chocolate, I did it the way you are supposed to i.e. in a bowl over a pan of gently simmering water.  Yet it did not turn out, I seem to be incapable of melting chocolate this way.  Which is why I tend to just stick the bowl in the microwave for 10 second bursts until its all melted! 
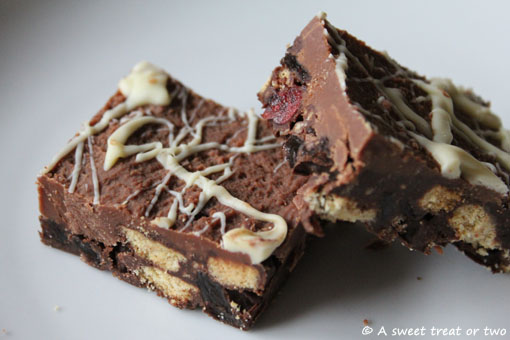
Mishaps aside, it turned out ok in the end, it even looked pretty good once I cut it all up.

Tiffin/Refridgerator Cake - Adapted from a few different recipes

75g margarine
3 tsbp golden syrup
350g chocolate, roughly chopped (I used a mix of milk and dark)
175g digestive biscuits, roughly broken
70g glace cherries
80g raisins

For the Topping:
35g margarine
250g milk chocolate

Decoration (optional):
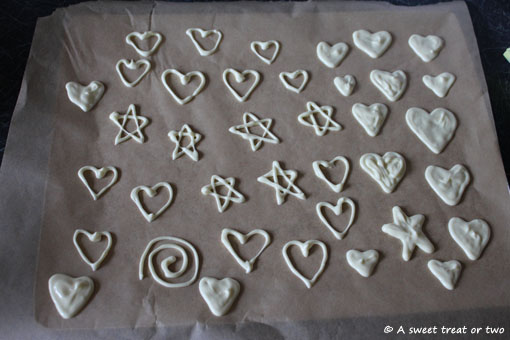
50g white chocolate, melted

1.  Grease a cake tin of your choice, deep or shallow depending on how you thick you want your cake.  I used a tin that was about 27x18cm.
2.  Put the chocolate, margarine and golden syrup in a small pan and heat gently until melted. 
3.  Bash up the biscuits and add to the chocolate mix, along with the cherries and raisins.  Stir until combined.
4.  Pour into the tin and roughly level the surface.  Chill in the fridge for about an hour.
5.  Melt the milk chocolate and butter, then pour over the chilled mix.  Put back into the fridge until set.
6.  Melt the melt chocolate and roughly flick over the top of the cake with a spoon.  Put back in the fridge and let it set.

Wednesday 3 November 2010

Mint Choc Chip Cupcakes


My favorite flavour combination is and always has been Mint Choc Chip, I can't get enough of it.  I love mints and I love chocolate, so the two together is just heaven to me.  I'm not a big ice cream eater but I could eat Mint Choc Chip ice cream by the bucket full.  I found a little ice cream parlour near the edge of Lake Windermere (Lake District, Cumbria) one holiday a few years back which did the most amazing Mint Choc Chip ice cream, I've never found anywhere thats come close.


Anyway, enough rambling about ice cream and onto the cupcakes.  I've been meaning to make these for a while but kept forgetting or not having the time when I did remember.  Then someone else made some and it reminded me. 
I had the recipe in mind, I was going to use my favourite victoria sandwich recipe but with cocoa powder and chocolate chunks and then my favorite buttercream but adapted to be mint chocolate.  Pretty simple I thought.  I made the cakes no problem but then came the time to make the buttercream, I had the butter and half the icing sugar mixed nicley when my whisk suddenly stopped.
Thinking it may have just got a little hot I turned it off and unplugged it for a few minutes.  Then I plugged it back in and tried again, this time it made a painful whirring sound and tried its best to work.  No such luck.  There was no way it was about to work.  So my only option was to finish it by hand, I know, I know, nothing wrong with that, unless you have problems with your muscles like I do.  To cut a long story short I eventually finished the buttercream, it took me probably 30 minutes longer than it does with the whisk.  As for the taste?  Its without a doubt the nicest buttercream I've ever made.  So creamy, soft and fluffy, I had to add milk to make it a little easier to beat, which I never usually do and the taste was so much better for it. 
Verdict?  Having very painful, dead arms for over 4 days afterwards was totally worth it.


Mint Choc Chip Cupcakes - My own recipe

For the chocolate chip cupcakes:
100g caster sugar
100g margarine
75g self raising flour
25g cocoa powder
2 eggs
100g milk chocolate, roughly chopped
1 or 2 tbsp milk (its upto you how much, but generally if the mix is quite thick then add a spoonful or two)

For the mint chocolate buttercream:
75g margarine
150g icing sugar
40g cocoa powder
2 tbsp milk
1 tsp peppermint essence (roughly)

1.  Cream the margarine and sugar together until light and fluffly.
2.  Add one egg and a spoonful of flour, beat until just combined.  Repeat with the second egg.
3.  Fold in the rest of the flour and cocoa powder, one spoonful at a time until you have a little bit of flour left.
4.  Fold in the milk and finally the last of the flour until it has just combined.
5.  Add in the chocolate chucks and stir as little as possible to mix them in.
6.  Spoon the mixture into muffin cases until 3/4 full.
7.  Cook on 180c for about 15 to 20 minutes until a cocktail stick inserted comes out clean (bar any melted chocolate).  Put on wire rack to cool.
8.  Now to make the buttercream.  Beat the butter until it is nice and soft and fluffy, then slowly add the icing sugar.
9.  Add about half the cocoa powder and beat, then put in a spoonful of milk and mix.  Repeat with the remaining cocoa powder and milk.
10.  Add the peppermint essence a few drops at a time.  Keep tasting until you are happy with the flavour.
11.  Pipe the buttercream onto your cupcakes or spread with a knife.
Next time I need some After Eight mints to decorate them with!

Wednesday 27 October 2010

Coconut Cherry Cupcakes

Mmm cherries and chocolate, my 2 favorite things to find in a cake!

I'm such a bad blogger at the moment, sorry!  I had a busy week or so sorting out an exciting new work/business thing (sadly not food related), and then I was ill yet again.  I know, I know, thats all I've said lately and I promise it won't be said at all in my next post! 


So, moving on to the food.  I've made a few new recipes lately, all of which I promise to upload over the next week or two.  The first of which was these coconut cherry cupcakes with added chocolate chunks, complete with milk chocolate ganache and white chocolate decorations.  Why I've never made chocolate ganache before I have no idea but it is amazing, I am converted.  Then I made iced marshmallow coconut cookies, which were a bit of a disaster looks wise but tasted great.  Then a few days ago I finally got round to making brownies, from a recipe I found on the BBCs website which had great reviews, and it definatly lived up to its hype. 
Finally today I've made more lemon cupcakes, I had to make sure my finished recipe was still good and not just a first time fluke.  I scooped out the middle and added a dollop of lemon curd and then topped with lemon buttercream and decorated with lemon zest.  Well if you're going to go lemon then you might as well use as much as possible!


As well as it being my first time making a ganache, it was also the first time I've ever piped chocolate.  I've kind of avoided it before, thinking it would be too fiddly and messy, that the chocolate would cool and harden before I'd even done anything.  My hands can also go quite shakey when I'm trying to do anything that requires a steady hand!  But it was surprisingly easy and the chocolate stayed melted in the bag.  I'll be the first to admit that the decorations aren't anything special but I'm pretty pleased for my first try.


Coconut Cherry Cupcakes from The Complete Book of Cupcakes, Cheesecakes and Cookies

For the cake:
125g butter, softened
1/2 tsp coconut essence
150g caster sugar
2 eggs
80ml milk
40g desiccated coconut
70g glace cherries, roughly chopped
50g dark chocolate, roughly chopped
150g self raising flour
35g plain flour

For the ganache:
60ml cream
100g milk chocolate, roughly chopped

For the decorations:
150g white chocolate buttons
Desiccated coconut to sprinkle

1. Preheat your oven to 180c (160c fan forced) and line a muffin pan with paper cases.  I got 12 cupcakes out of this recipe using muffin size cases.
2.  Beat butter, essence, sugar and eggs in a small bowl until combined.
3.  Stir in the milk, coconut, cherries and chocolate.  Then stir in the sifted flours.
4.  Divide amongst cases, smoothing the surface of each.  Bake for about 25 minutes or until a cocktail stick inserted into the cake comes out clean (bar any melted chocolate).
5.  Make the ganache.  Bring the cream to the boil in a small pan, then pour oven the chopped chocolate in a small bowl.  Stir until smooth.  Cover the bowl and allow to stand at room temperature until it is of a spreadable consistency.
6.  Melt the white chocolate (either in the microwave at 10 second bursts, or in a bowl over a pan of simmering water) and spoon into a piping bag.
7.  Pipe different sized hearts (or any other shape you want) onto a tray covered with a sheet of baking paper.  Pop the tray into the fridge until the chocolate has set.
8.  Spread each cupcake with ganache and decorate with your chocolate hearts, sprinkle with a little coconut.
Coconut Cherry Cupcakes


Sunday 26 September 2010

Lemon Drizzle Cake

 
Lemon Drizzle Cake


Sorry for the lack of updates, I meant to post this sooner but I've been pretty ill the past week.
Anyways, Lemon Drizzle cake has got to be one of my all time favourite cakes.  A good one is delicously moist, has a lovely lemon flavour that isn't too tangy or barely there and has the most amazing hard lemon sugar topping.  So why on earth I've never tried making one before is beyond me.  A quick search on the internet a couple of weeks ago found me a recipe that looked pretty simple, and a few extra ingredients on the supermarket shopping list a couple of days later got me everything that I needed.  And so all that was left to do was bake it.


The recipe that I've used was literally the first entry from my google search, its from the BBC's Good Food website and is by Tana Ramsay.  I'll definately be using it again, in fact I've already had requests to make it for other people.  The sponge is incredibly moist and the lemon flavour certainly comes through.  Though next time I might be tempted to add a little more zest to the mixture and possible a teaspoon or two of lemon juice.
You need a loaf tin to make drizzle cake (though I'm sure you could use a normal round cake tin if you don't have one), the recipe says to use a 8x21cm tin however I don't have a tin that size.  I ended up using a tin about 12x19cm which was a good size for the amount of mix.  Don't forget it will rise up a fair bit whilst cooking.  This tin made a good sized cake but next time I will probably use two smaller (9x19cm) tins. 

As you'll see in a minute, my drizzle topping didn't exactly turn out according to plan.  I think I made a couple of mistakes!  Firstly I probably put about 10 too many holes in the top of my cake, and secondly I doubled the amount of lemon juice for the drizzle without bothering to double the sugar too.  Therefore it was runnier (is that a word!? Oh well it is now!) than what it should have been, also the sugar had more liquid to dissolve into. 
Oh well at least I know what to do for next time!  You never know if you don't try right.
So the recipe, as I said, you can find it here at the BBC's Good Food website.  The cake itself will keep pretty well in an airtight container, it will stay fresh for about 4 days or so.  But we still had some left after 8 days and although you could tell it wasn't fresh it was still moist and tasted good too.
Enjoy!

Monday 20 September 2010

Chocolate Coconut Slices

I have grown up eating these Chocolate Coconut slices, its one of the things I can always remember my Mum baking. The recipe comes from my Grandma (my Mum's Mum) who I sadly never got to meet but judging by the recipe book of hers that this came out of she knew how to make some amazing things.
Chocolate Coconut Slices

8oz coconut
6oz sugar
2 eggs (well beaten)
4oz margarine
4oz chopped cherries
5 – 8oz cooking chocolate

1. Line a swiss roll tin with greaseproof paper
2. Melt chocolate and pour into tin, leave to set (use more chocolate if you want a thicker layer)
3. Beat margarine, coconut, sugar and eggs until combined
4. Stir in cherries
5. Spread mix over chocolate
6. Bake in moderate oven, Gas mark 3/ 160c until set and golden brown. This takes roughly 30 minutes depending on the oven

7. When cool cut into slices

Friday 17 September 2010

Top Five: Cake stands

My new stand from Tesco

Having just got myself a new cake stand (or rather after my lovely Mum bought me one) I can't stop myself looking for more. There's something charming and homely about cake stands that I just can't help but love. However until I have a place of my own or my bedroom miraculously triples in size I have no free space to store them.
So if you like this is my little wish list.

I love this, its so fancy and proper. It looks like it should only be brought out at very fancy dinner parties.

Wire Cupcake tree
Now these are amazing, I think they are great and such fun. If I had one of these I'd want it permanently on show filled with cupcakes...that actually sounds like a good life!

When I chose the stand above it was a toss between that and this Time for Tea stand, I love both but the Poppy stand won.

I love all things spotty and retro, and red just happens to be my all time favourite colour therefore this stand couldn't be any more perfect!

This wire basket stand is incredible, I've not seen anything like it before. The vintage charmit has would be great for a tea party.

Sunday 12 September 2010

Cheesecake Brownies

Sorry for not posting this sooner, I had planned to share this recipe at the start of the week but I’ve been quite unwell this past week.
I’ve only ever made cheesecake about 3 times in my life, despite having eaten a hell of a lot of it! The first time I made it, it tasted amazing but collapsed the second it came out of the tin. The second seemed to have great potential but just didn’t live up to it. And the third was incredible. Quite honestly one of the tastiest cheesecakes I’ve ever eaten, and I’m not just saying that because I made it! My family loved it, my Mum and I were quite disappointed when it came to an end! And the best bit about it? It’s so very simple. I’ve read recipes for cheesecakes that have had hundreds of steps, you have to do this followed by that and then a bit more of this, they can be never-ending.

I’m definitely going to be making these again, when they are so quick and easy it would be a shame not to. Though I might have to make double the recipe as an attempt to make it last longer!
Cheesecake Brownies - from The Complete Book of Cupcakes, Cheesecake and Cookies

For the brownie base:
125g butter, chopped
150g dark eating chocolate, roughly chopped
1 egg
150g caster sugar
110g plain flour
35g self raising flour

For the cheesecake topping:
250g cream cheese, softened
1tsp vanilla extract
75g caster sugar
1 egg
125ml cream

1. Preheat the oven to 180c.
2. Grease a deep 19cm square cake tin and line with baking paper.
3. Combine the butter and chocolate in a small pan, stir over a low heat until smooth. Allow to cool.
4. Beat the egg and sugar in a small bowl with electric mixer until thick and creamy.
5. Stir in chocolate mixture and sifted flours.
6. Spread mixture into pan and bake for 10 minutes.
Whilst that is cooking you can the cheesecake topping:
7. Beat the cheese, vanilla extract, sugar and egg in a small bowl until smooth. Then beat in the cream.
8. Pour the topping mix over the brownie base and return to the oven for about 15 minutes.
9. Leave in the oven to cool, with door ajar.
10. Once cool refrigerate for at least 3 hours.

They suggest serving with fresh raspberries but I didn't have any, so I served with fresh strawberries and grated dark chocolate.

Friday 3 September 2010

Top Five: Recipe Books

I've decided to try and do a regular feature, something to keep me occupied and to give me something useful to search for on the internet. Also something to make me remember to keep updating! Therefore every other Saturday I will try and post up a Top Five list, a list of things I want, things I read or just simply things I find interesting or inspiring.

The first list today is Recipe books, personally I love them. From simply flicking through one and staring at the photographs to finding that one recipe that really tickles your taste buds. I think they are great. So here are five recipe books that I've had my eye on lately.

The Primrose Bakery has such a reputation for amazing cakes that it would hard not to want to try some. Yet since I live so far away I guess making my own is the closest I'm going to get for the time being.

Ahh Nigella, the queen of cookery programmes and books. I've heard great things about this book, so surely Nigella can do no wrong?

Theres something about Rachel Allen that makes me watch and listen. I've watched her cookery programmes for a while now and I love the Bake series.

Any book solely dedicated to cupcakes has to be good, right!

As I've mentioned before, decorating cakes has always been my weak point. Therefore cakes like these inspire me so much, I only wish I could create a cake half as good as some of the examples in this book. I could spend ages staring at this book wishing I was able to do that.

Since I probably won't be getting any of these anytime soon I will have to stick with the ones I've got and the internet for inspiration.
Oh and for a little sneak preview, the next recipe I'll be sharing is for Cheesecake Brownies!

Saturday 28 August 2010

Chocolate Fudge Brownie Cookies

The past week has been filled with baking, I don’t think I’ve ever baked so much in one week before. I started with chocolate cornflake buns on Saturday with the help of my 2 year old nephew JT, I wanted to bake but wasn’t feeling too good so needed something quick and easy, and that JT could help with. Turns out he’s not too fond of the hob so ran away to play with his train set, however he returned just in time to lick the pan clean. Something which he enjoyed quite a lot!
Then on Tuesday I made rock buns using my Mums old recipe she got from school. Rock buns, if you’ve never heard of them before, are a cross between cake and scone mix with a bit of cinnamon thrown in. They also, quite conveniently, come out of the oven looking like rocks!
Wednesday came the day I’ve been waiting for, I made warm chocolate melt in the middle cupcakes. I’ve been wanting to make these for a few weeks but as they really need to be eaten warm, I needed the whole family to be here to eat them. And so finally on Wednesday everyone was here, including JT and my Mums crazy friend C (who expects there to be fresh baked goods every time she comes round!) and I had my chance to make them. They were so so good, however in the middle of taking photos of them my camera broke. As someone who takes photo’s every single day and loves her camera to bits you can imagine how upset I am. However I do have a new camera on order, the Canon 550D, which should be here sometime in the next week. In the mean time I have to use a combination of my phone, my old Kodak compact and my mums little Panasonic, to try and get some passable pictures.
And so to finish off my baking week, I did some late night baking yesterday to try and ease my boredom. I made chocolate and vanilla marble cupcakes, which have been decorated today with a chocolate buttercream frosting and chunks of clotted cream fudge that I picked up a couple of weeks ago on my holiday to North Wales.

Onto today’s recipe, these cookies are completely delicious. I made them a couple of months back and have since handed the recipe out to quite a few people, all of whom agree that they are delicious. I’m a big fan of cookies and as far as I’m concerned the more chocolate the better. So when I came across this recipe in ‘The Complete Book of Cupcakes, Cheesecakes and Cookies’ and saw it had 3 lots of chocolate in it, I knew it had to be good. I wasn’t disappointed.
The book calls them chocolate fudge brownie and to be honest I’m really not sure where the fudge brownie part comes in, aside from the chocolate and nuts. But I don’t really care what they call them especially as they are so tasty. I’m not a fan of nuts so I just left them out which worked fine.
Chocolate Fudge Brownie Cookies

250g butter, softened
1 tsp vanilla extract
165g caster sugar
165g brown sugar
1 egg
300g plain flour
25g cocoa powder
1 tsp bicarbonate of soda
45g finely chopped roasted hazelnuts
120g coarsely chopped dark eating chocolate
120g coarsely chopped milk eating chocolate
120g coarsely chopped white eating chocolate

1. Preheat oven to 180°c (160°c fan forced).
2. Grease baking trays, line with baking paper.
3. Beat butter and sugars in a small bowl, add extract and egg and beat until light and fluffy.
4. Transfer to large bowl.
5. Stir in sifted flour, cocoa and soda in two batches. Then stir in the nuts and chocolate.
6. Roll level tablespoons of dough into balls and place 5cm apart on baking trays.
7. Bake for about 12 minutes.
8. Leave to cool on trays.

They say you can make about 48 small cookies out of this mix, the first time I made them I got 25 large ones and then the second time I got about 35 medium sized ones.
A couple of tips with this recipe, firstly make sure you keep the dough balls well spaced out on your baking trays as they spread a lot. Secondly don’t be tempted to flatten your dough balls out a bit, I did this the first time I made them and because they spread out so much whilst cooking they became a bit too thin.Hope you enjoy them!

Oh and apologies for the rubbish photos, I don’t know if it was me, the camera or the cookies but I just couldn’t get a decent photograph of them. I’ll make them again once I get my new camera.

Tuesday 17 August 2010

Heavenly cupcakes


Cupcakes for Bookworms, Photo courtesy of Heaven is a Cupcake

I often am in awe of anyone who can make truely amazing looking cakes, its something I can only aspire to do. Decoration has always been my weak point, so I love seeing other people's creations. One such person is Lucy of Heaven is a Cupcake, her cupcakes always look impeccable and the themes are so fun. Unfortunately I live too far away from her to sample them in person but I have been told they taste just as good as they look.

Somewhere Over the Rainbow Cupcake, photo courtesy of Heaven is a Cupcake

So when Lucy shared her recipe for Vanilla Cupcakes I just had to have a go and bake them. The first thing I have to say is that it's the easiest recipe I've ever followed for cake mix. Everything just goes in the bowl and you mix. Simple. They are incredibly tasty too. I made a mix of large and smaller cupcakes, and I think I need to be more generous with the buttercream!
If you want to have a go you can find Lucy's recipe here. It's very easy to follow, so don't worry if you haven't really made any cakes before.


This is how my cakes turned out, they don't look nearly as good as Lucy's but practice makes perfect! My arms nearly dropped off mixing the food colouring into the buttercream, I added over half a bottle and they still weren't as pink as I wanted. I'm going to have to find some gel food colours.


The lovely Lucy is also holding a giveaway on her blog at the moment. Courtesy of CSN stores, you can win £40 worth of vouchers to spend on their online stores. So if you want to stock up on more baking equipment head on over to Lucy's blog and enter!

Sunday 1 August 2010

Rocky Road cupcakes

So I'm just going to admit to it straight away, I'm not a neat baker...and by that I mean I'm messy, I take up most of the work tops in the kitchen and I have been known to use every spoon in the house (like this recipe for example, we have a lot of teaspoons, and I mean a lot. But I ran out about half way through!). Just the other week when I was making buttercream I managed to cover most of the kitchen in icing sugar dust. I had to clean inside cups, around the kettle and the fronts of the cupboard doors. I know icing sugar can just erupt with dust, but never have I had to clean most of the kitchen before, everything was covered in what looked like a very fine layer of snow.


I guess the reason why I'm saying this is just to let you know, my photo's are not perfect, there will be lumps of dropped cake mix dotted around. You have been warned!
And so, back to the baking. For my birthday this year my great friend, F, bought me an amazing recipe book, its got some fantastic looking cupcakes in it and I couldn't wait to test them out. I can't actually find a link to it, but its called The Complete Book of Cupcakes, Cheesecakes and Cookies.


I must have spent hours flicking through it admiring all the photographs, reading the recipes, seeing what ingredients I have and getting hungrier and hungrier as I flicked through each page. I decided to start with the Rocky Road cupcakes (as seen in my header), firstly because they looked so incredibly delicious and secondly, well I can't really refuse anything that involves chocolate.
The cupcake itself is a marble cake of 3 layers, vanilla, chocolate and pink vanilla. When I make them again I'm going to miss out the pink layer as it didn't really show through as much as the others, and it didn't really bring another flavour.


When beating together the cake mix, it looked as if it was about to separate and curdle, but don't worry as long as it doesn't actually curdle then once it's cooked it'll be fine. I wouldn't be surprised if this only happened with me though, it wouldn't be the first time!


I must say, despite a few worries along the way, was quite scrumptious. The cake was very tasty and I was impressed at how well the marble effect showed through. The topping was by far the best bit, generally I can't eat much rocky road mix as it can be incredibly sickly but this was just the perfect amount.
They will definately be made again.


And so to the recipe, as that is what you must be waiting for.

For the marble cake
125g butter, softened
½ teaspoon vanilla extract
150g caster sugar
2 eggs
185g self raising flour
80ml milk
Pink food colouring
1 tablespoon cocoa powder
2 teaspoons milk, extra

For the topping (you can double this if you want extra!)
35g unsalted roasted peanuts (these can be left out, as I did)
100g halved red glacé cherries
50g pink and white marshmallows, roughly chopped
25g flaked or dessicated coconut, toasted
100g milk chocolate, melted

Decoration
50g Cadbury dairy milk buttons, melted

1. Preheat your oven to 180°c and line a 12 hole muffin pan with paper cases (I used smaller 'fairy' cases as I didn't have any muffin cases)
2. Beat butter, extract, sugar and eggs in a small bowl until light and fluffy
3. Stir in sifted flour and milk in two batches
4. Divide the mixture equally into 3 bowls. Tint one bowl pink. Blend the sifted cocoa with the extra milk in a cup and then add to another bowl. Leave the third bowl plain.
5. Drop alternate spoonfuls of each mixture into the cases. Then pull a skewer or toothpick back and forth through the mixtures to create the marble effect. Smooth the surface.
6. Bake for about 20 minutes, or 30 if using large cases. To check if they are ready, insert a toothpick into the cake, if it comes out clean then its ready.
7. Leave on a wire rack to cool.
8. Put all the topping ingredients into a bowl and stir to combine. For decoration purposes you may want to hold back a small amount of each of the topping ingredients so that they can be added on top, as once they go in the bowl they will get covered in chocolate!
At this point you might want to cut the tops off some of your cupcakes to create a flatter surface for the rocky road mix. Feel free to eat the cut offs as you go along, you deserve it!
9. Place spoonfuls of the topping onto each cupcake. You may need to slightly pile it on to stop if from falling off, and add some of your held back topping so that you can actually tell what's in it!
10. Lastly drizzle each cupcake with the melted chocolate buttons.

Enjoy!

Saturday 31 July 2010

Sweet Treats

Growing up in a house where some sort of pudding was always on offer after each meal (bar breakfast of course!) it’s no surprise that I love anything sweet. I’ve grown up with baking, my Mum bakes, although not as much as I do now and she has made some great things over the years (think pink castles and tropical island birthday cakes).

I’ve always done the odd bit of baking here and there, starting with things like gingerbread men for Christmas, chocolate cakes for birthdays and the odd biscuit here and there. Over the past year or so my baking has increased dramatically, cupcakes, cakes, biscuits, cheesecakes, cookies, there’s always something on my mind that I want to bake. So I thought it would be nice to have somewhere to put it all, a place to keep all my photo’s and share a recipe or two. And so we have A Sweet Treat or Two, to store anything I think is worth sharing.

Some sweet treats to look forward to…
Rocky road cupcakes
Cheesecake brownies
Lemon cake
Vanilla cupcakes
Chocolate coconut slices
And much much more.