The past week has been filled with baking, I don’t think I’ve ever baked so much in one week before. I started with chocolate cornflake buns on Saturday with the help of my 2 year old nephew JT, I wanted to bake but wasn’t feeling too good so needed something quick and easy, and that JT could help with. Turns out he’s not too fond of the hob so ran away to play with his train set, however he returned just in time to lick the pan clean. Something which he enjoyed quite a lot!
 Then on Tuesday I made rock buns using my Mums old recipe she got from school. Rock buns, if you’ve never heard of them before, are a cross between cake and scone mix with a bit of cinnamon thrown in. They also, quite conveniently, come out of the oven looking like rocks!
Wednesday came the day I’ve been waiting for, I made warm chocolate melt in the middle cupcakes. I’ve been wanting to make these for a few weeks but as they really need to be eaten warm, I needed the whole family to be here to eat them. And so finally on Wednesday everyone was here, including JT and my Mums crazy friend C (who expects there to be fresh baked goods every time she comes round!) and I had my chance to make them. They were so so good, however in the middle of taking photos of them my camera broke. As someone who takes photo’s every single day and loves her camera to bits you can imagine how upset I am. However I do have a new camera on order, the Canon 550D, which should be here sometime in the next week. In the mean time I have to use a combination of my phone, my old Kodak compact and my mums little Panasonic, to try and get some passable pictures.
And so to finish off my baking week, I did some late night baking yesterday to try and ease my boredom. I made chocolate and vanilla marble cupcakes, which have been decorated today with a chocolate buttercream frosting and chunks of clotted cream fudge that I picked up a couple of weeks ago on my holiday to North Wales.
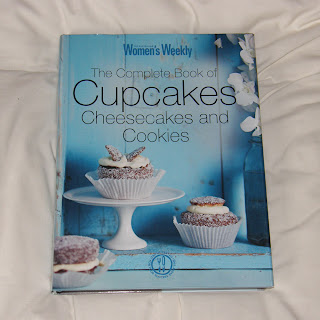
 Onto today’s recipe, these cookies are completely delicious. I made them a couple of months back and have since handed the recipe out to quite a few people, all of whom agree that they are delicious. I’m a big fan of cookies and as far as I’m concerned the more chocolate the better. So when I came across this recipe in ‘The Complete Book of Cupcakes, Cheesecakes and Cookies’ and saw it had 3 lots of chocolate in it, I knew it had to be good. I wasn’t disappointed.
 The book calls them chocolate fudge brownie and to be honest I’m really not sure where the fudge brownie part comes in, aside from the chocolate and nuts. But I don’t really care what they call them especially as they are so tasty. I’m not a fan of nuts so I just left them out which worked fine.
 Chocolate Fudge Brownie Cookies
250g butter, softened
1 tsp vanilla extract
165g caster sugar
165g brown sugar
1 egg
300g plain flour
25g cocoa powder
1 tsp bicarbonate of soda
45g finely chopped roasted hazelnuts
120g coarsely chopped dark eating chocolate
120g coarsely chopped milk eating chocolate
120g coarsely chopped white eating chocolate
1. Preheat oven to 180°c (160°c fan forced).
2. Grease baking trays, line with baking paper.
3. Beat butter and sugars in a small bowl, add extract and egg and beat until light and fluffy.
4. Transfer to large bowl.
5. Stir in sifted flour, cocoa and soda in two batches. Then stir in the nuts and chocolate.
6. Roll level tablespoons of dough into balls and place 5cm apart on baking trays.
7. Bake for about 12 minutes.
8. Leave to cool on trays.
They say you can make about 48 small cookies out of this mix, the first time I made them I got 25 large ones and then the second time I got about 35 medium sized ones.
A couple of tips with this recipe, firstly make sure you keep the dough balls well spaced out on your baking trays as they spread a lot. Secondly don’t be tempted to flatten your dough balls out a bit, I did this the first time I made them and because they spread out so much whilst cooking they became a bit too thin. Hope you enjoy them!
 Hope you enjoy them!
Oh and apologies for the rubbish photos, I don’t know if it was me, the camera or the cookies but I just couldn’t get a decent photograph of them. I’ll make them again once I get my new camera.