
So I'm just going to admit to it straight away, I'm not a neat baker...and by that I mean I'm messy, I take up most of the work tops in the kitchen and I have been known to use every spoon in the house (like this recipe for example, we have a lot of teaspoons, and I mean a lot. But I ran out about half way through!). Just the other week when I was making buttercream I managed to cover most of the kitchen in icing sugar dust. I had to clean inside cups, around the kettle and the fronts of the cupboard doors. I know icing sugar can just erupt with dust, but never have I had to clean most of the kitchen before, everything was covered in what looked like a very fine layer of snow.

I guess the reason why I'm saying this is just to let you know, my photo's are not perfect, there will be lumps of dropped cake mix dotted around. You have been warned!
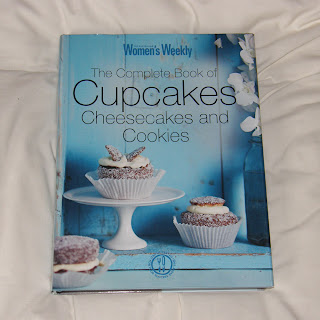
And so, back to the baking. For my birthday this year my great friend, F, bought me an amazing recipe book, its got some fantastic looking cupcakes in it and I couldn't wait to test them out. I can't actually find a link to it, but its called The Complete Book of Cupcakes, Cheesecakes and Cookies.
I must have spent hours flicking through it admiring all the photographs, reading the recipes, seeing what ingredients I have and getting hungrier and hungrier as I flicked through each page. I decided to start with the Rocky Road cupcakes (as seen in my header), firstly because they looked so incredibly delicious and secondly, well I can't really refuse anything that involves chocolate.
The cupcake itself is a marble cake of 3 layers, vanilla, chocolate and pink vanilla. When I make them again I'm going to miss out the pink layer as it didn't really show through as much as the others, and it didn't really bring another flavour.
The cupcake itself is a marble cake of 3 layers, vanilla, chocolate and pink vanilla. When I make them again I'm going to miss out the pink layer as it didn't really show through as much as the others, and it didn't really bring another flavour.

When beating together the cake mix, it looked as if it was about to separate and curdle, but don't worry as long as it doesn't actually curdle then once it's cooked it'll be fine. I wouldn't be surprised if this only happened with me though, it wouldn't be the first time!

I must say, despite a few worries along the way, was quite scrumptious. The cake was very tasty and I was impressed at how well the marble effect showed through. The topping was by far the best bit, generally I can't eat much rocky road mix as it can be incredibly sickly but this was just the perfect amount.
They will definately be made again.

And so to the recipe, as that is what you must be waiting for.
For the marble cake
125g butter, softened
½ teaspoon vanilla extract
150g caster sugar
2 eggs
185g self raising flour
80ml milk
Pink food colouring
1 tablespoon cocoa powder
2 teaspoons milk, extra
For the topping (you can double this if you want extra!)
35g unsalted roasted peanuts (these can be left out, as I did)
100g halved red glacé cherries
50g pink and white marshmallows, roughly chopped
25g flaked or dessicated coconut, toasted
100g milk chocolate, melted
Decoration
50g Cadbury dairy milk buttons, melted
1. Preheat your oven to 180°c and line a 12 hole muffin pan with paper cases (I used smaller 'fairy' cases as I didn't have any muffin cases)
2. Beat butter, extract, sugar and eggs in a small bowl until light and fluffy
3. Stir in sifted flour and milk in two batches
4. Divide the mixture equally into 3 bowls. Tint one bowl pink. Blend the sifted cocoa with the extra milk in a cup and then add to another bowl. Leave the third bowl plain.
5. Drop alternate spoonfuls of each mixture into the cases. Then pull a skewer or toothpick back and forth through the mixtures to create the marble effect. Smooth the surface.
6. Bake for about 20 minutes, or 30 if using large cases. To check if they are ready, insert a toothpick into the cake, if it comes out clean then its ready.
7. Leave on a wire rack to cool.
8. Put all the topping ingredients into a bowl and stir to combine. For decoration purposes you may want to hold back a small amount of each of the topping ingredients so that they can be added on top, as once they go in the bowl they will get covered in chocolate!
At this point you might want to cut the tops off some of your cupcakes to create a flatter surface for the rocky road mix. Feel free to eat the cut offs as you go along, you deserve it!
9. Place spoonfuls of the topping onto each cupcake. You may need to slightly pile it on to stop if from falling off, and add some of your held back topping so that you can actually tell what's in it!
10. Lastly drizzle each cupcake with the melted chocolate buttons.
Enjoy!
Dont worry, Im a messy baker too - it's the best kind of baker ;)
ReplyDeleteThose look amazing!
Thank you! Yeah I think its more fun this way lol!
ReplyDelete